In order to get to know your camera and get used to the feel and so on, it can be useful, especially at the beginning, to take pictures in automatic mode. But if you want to take more ambitious photos, you should take a closer look at the settings and try out other modes. This does not mean that you have to shoot completely manually and make all settings yourself - although there are situations where this can be useful. There are semi-automatic modes that allow much more room for creativity than fully automatic modes. After all, the camera doesn't know what you want - for example, should the foreground or background be in focus or everything?
No matter what kind of camera you own or whether you are "only" taking pictures with your smartphone (here, too, many settings can be made with the "right" photo app), you should know which settings serve which purpose / what effect they have. This first part deals with shutter speed/exposure time and aperture. In the next part we add the ISO value and the relation between all three values before we take a closer look at the different camera modes, white balance and focus.
Shutter speed/exposure time
With the shutter speed you determine how long light will fall on the sensor of your camera. For example, if you set the shutter speed to 5 seconds, light will fall on the camera sensor for 5 seconds. The shorter exposure times are shown with a fraction, e.g. 1/30 or 1/1000th. The longer you expose, the quieter the camera should be held or stand on a tripod for longer exposures, otherwise motion blur will occur. The image will be blurred because the camera moves during the exposure (even vibration can cause this undesirable effect with longer exposures). Of course, this can also be used to achieve desired effects, e.g. if you want to capture the movement of clouds or water or if you want to create light drags (e.g. the headlights of passing cars as light strips). By the way, if you take pictures with less light, you can hardly avoid longer exposure times.
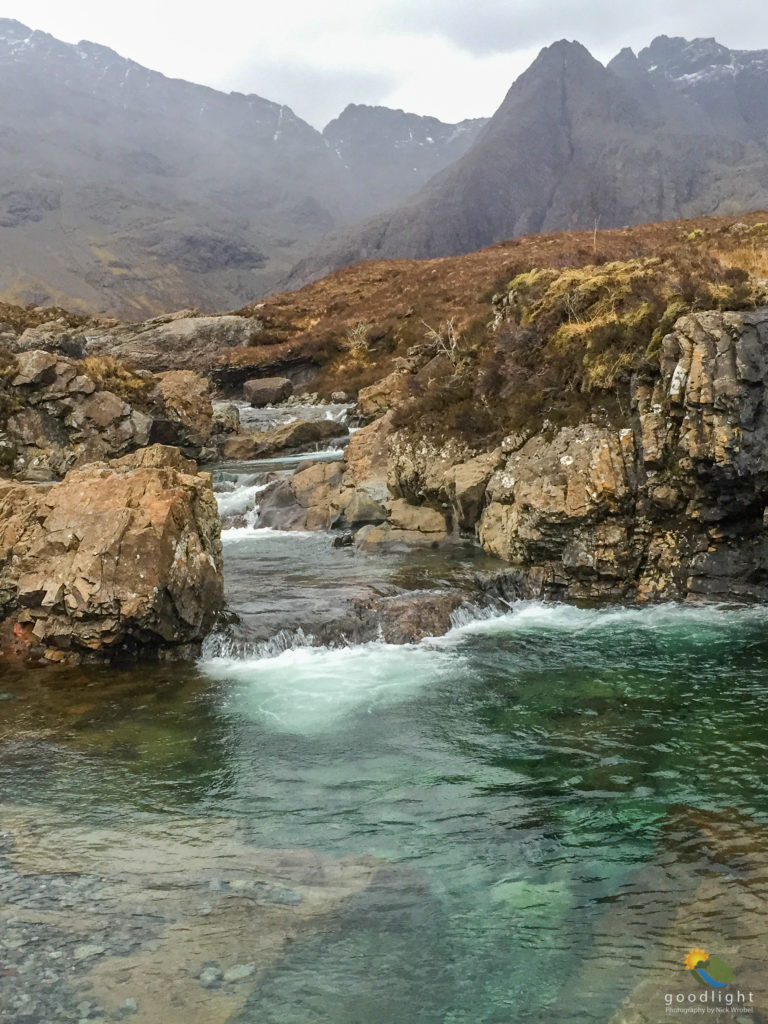
1/30 sec. exposure time 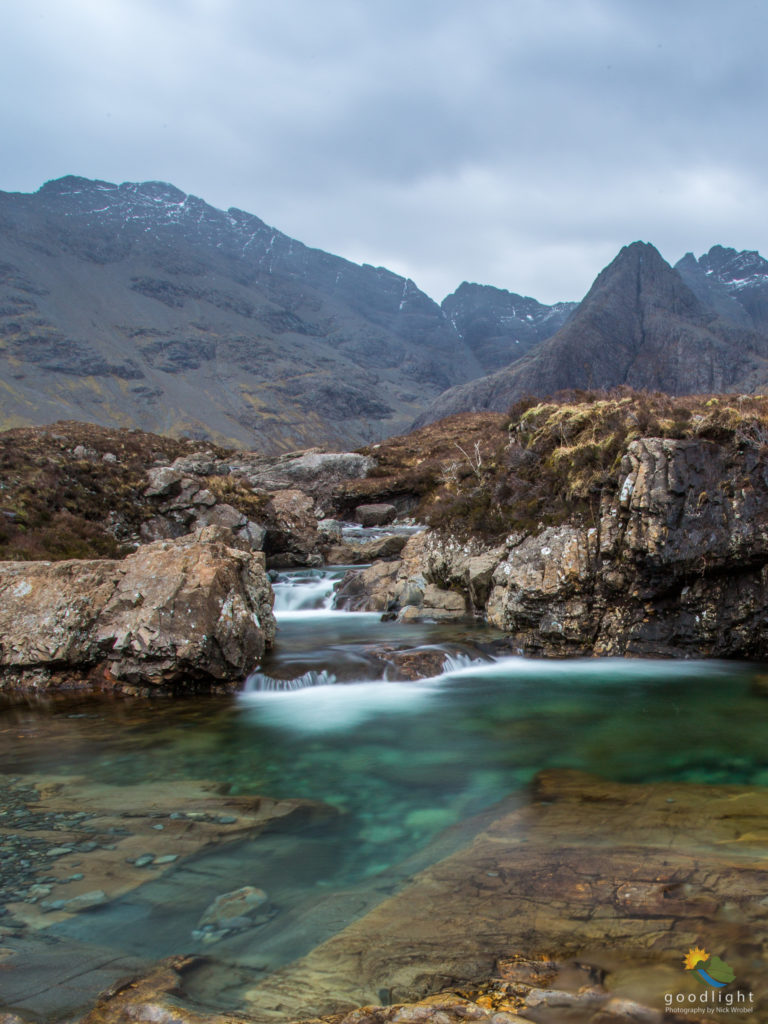
5 sec. exposure time
The left photo was taken with a rather short shutter speed, the sensor of the camera "caught" the light only very briefly. The flowing water is therefore only captured for a very short moment, while the right photo was taken with a shutter speed of 5 seconds and the water movement is quasi smoothed. E.g. a great effect can be achieved with waves with an exposure time of about 1/4 second.
Aperture
The aperture controls how much light hits the sensor simultaneously. If the aperture is wide closed, less light passes through, if it is wide open, a lot of light passes through. On the one hand this leads to the fact that you might have to expose longer with closed aperture (see shutter speed) to get enough light onto the sensor, on the other hand it has an effect on the sharpness ranges in a photo. This is called depth of field.
When the aperture is open, the area that is closer to or further away from the camera in relation to the focused subject is out of focus. But I don't need to expose for that long, because more light falls on the sensor. If the aperture is rather closed, the foreground and background tend to be in focus (see also 'hyperfocal distance' for advanced users), but I have to expose longer.
Which apertures are available usually depends on the lens. For example, fast lenses have a maximum aperture of f2.8. The further the aperture is closed, the higher this number. Aperture f32 would be a wide closed aperture, for example.
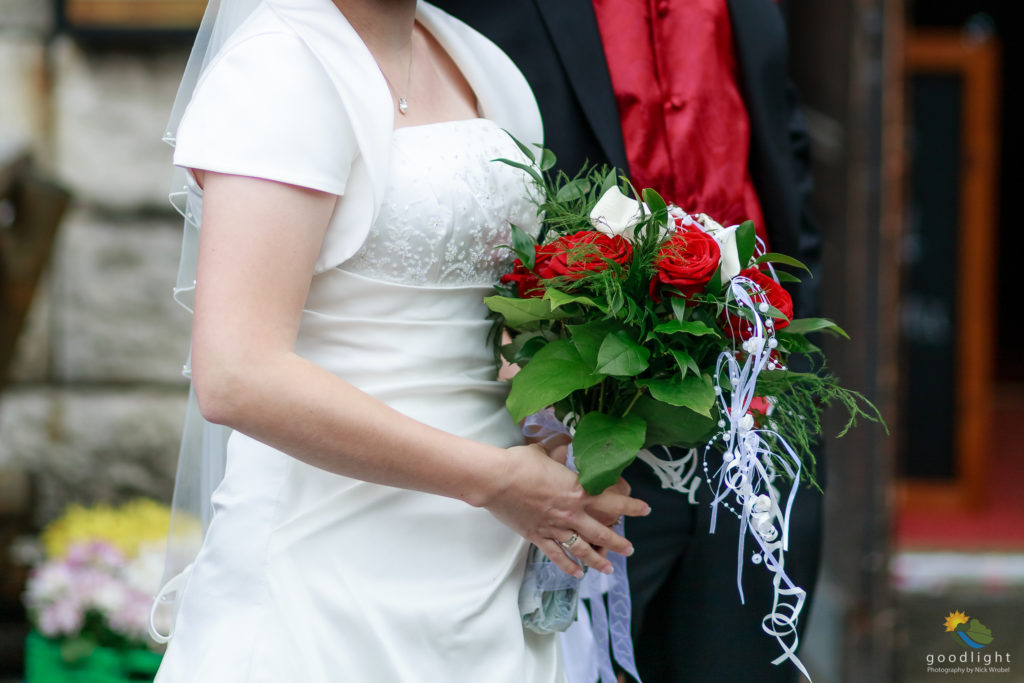
Aperture f1.8 (open aperture) 
Aperture f22 (wide closed aperture)
The left photo was taken with aperture f1.8. The focus was set on the bride (in focus), the background is out of focus. The subject was "brought out" with the background blur - an effect often used in portrait photography. The exposure time was quite short at 1/1250 sec.
In the right photo a quite closed aperture (f22) was used. This ensures that the foreground and background and everything in between are equally sharp. But this photo had to be exposed with 1/10 sec. longer.
So there is always a dependency between exposure time and aperture, but the ISO value must not be forgotten here either. More about this in the next article.